Convertible Amp
Rack Drivers Side Or Passenger Side
The convertible amp rack is made to mount securely on the side of
the trunk. Since the trunk in the convertible is nearly symmetrical, the
installation for left and right side are identical. Like our coupe amp
rack, the convertible amp rack comes with a mounting base and a blank cover
plate. This allows the individual to trim out a design around their amp to
their liking. The front edges of each piece align but the rear edge of the
cover plate is longer in order to meet up with the trunk lining once
installed. It's easiest to do your layout on a table before you install
the amp rack. The space below the folded top is quite limited. We
measured about 9 inches without hindering the top. So if your amp is wider
than 9" it may disrupt the top. Please don't ask us if your amp will
fit. You will know if it slides under the top or not.
Step 1 is to put your top UP. Next. release the pull-out
screen so it retracts. If you would like to remove it (we did), it is
bolted to the front wall of the trunk. Use a 10mm wrench to remove one nut
on each side. Pull each side off the stud and up and it will release so
you can remove it. Next, remove the trunk lining covering the trunk
floor. After that, remove the plastic trim piece that goes around the rear
of the trunk, just inside the opening. Remove the sidewall carpet on the
side you want to install your amp rack on. It is secured in several places
and you must release them all to remove the carpet. First, there is one
panel fastener right below the plastic trim where the screen locks into.
This one is a doozy so we highly recommend getting an upholstry tool because you
will use it a lot in your convertible. There are two more panel fasteners
in the corner. One at the top and one near the bottom. Once all the
clips are out, the sidewall carpet will start to come out. Twist it over
to its back side and unclip the wiring harness. To do so, remove the gray
clip from the conector and then it will disconnect.
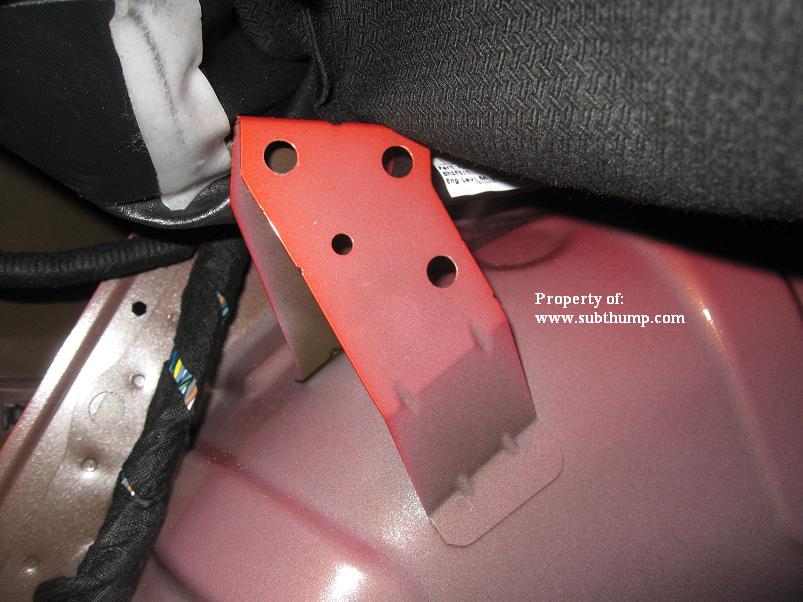
Once the side carpet is out, you will notice that there is a strap
(with holes) that is welded to the fender.
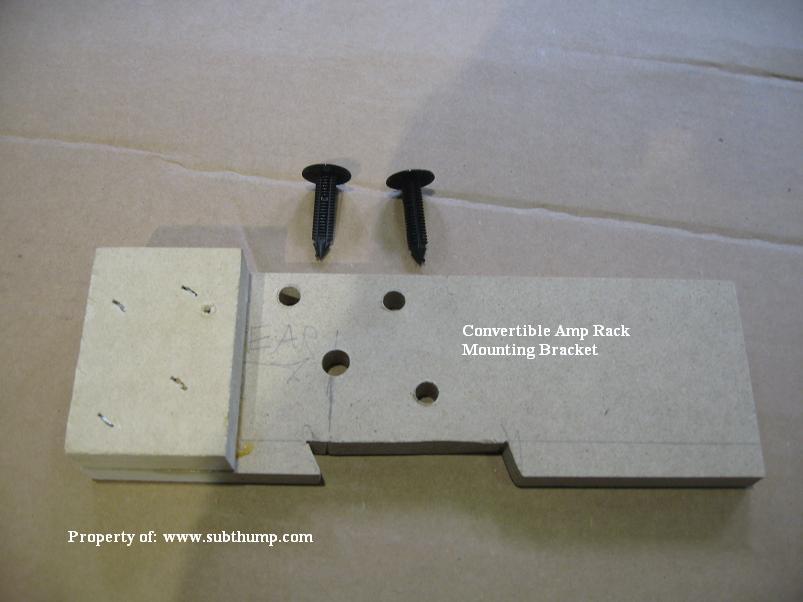
We have designed a mounting bracket that mounts to this strap to
enable you to screw your amp rack to. Here's what it looks like:
Included with the bracket are two panel fasteners and two 3"
long screws. The panel fasteners are used to secure the bracket to the
strap. The strap has 3 large holes. Slide the bracket behind the
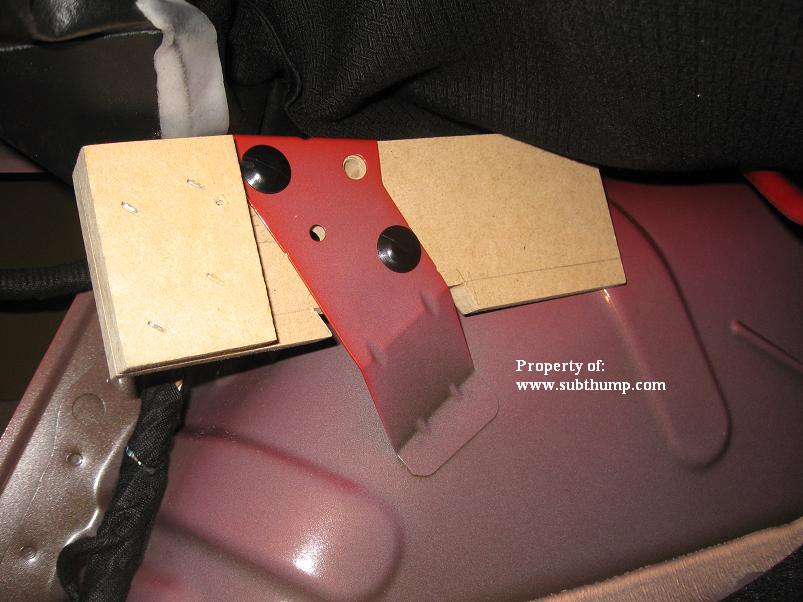
strap and use two of the panel fasteners to secure the block. The smaller
hole is where the carpet fastens to so make sure this hole is not
obstructed. Should look like this when finsihed: Take a good visual
for where the wooden parts of the block are located. If needed, make a
sketch because you will need it later on.
At this time, you will want to start thinking about how
you will run your wiring. You will want to make your power and ground
connections to your battery. It is also a great time to install your
Subthump 5g-x3rca harness to your boston amp (if equipped) or FARK harness
kit. Something I noticed on my new vert that wasn't present on my 2010
coupe is that on the boston amp x3 port connector, there is a red clip that
needs to be removed before the connector can be disconnected from the amp.
Once you have all your wiring ready, it's time to reinstall the sidewall
carpet. The amp rack base has two relief arcs cut into it to allow your
wiring to come thru. One at the front and one at the rear. We will
leave the wiring up to you. Once the sidewall carpet is secured, you can
place the amp rack base against the sidewall. It should pretty much fall
into place. Take the 3" screws and shoot them thru the amp base so the
sink into the wooden mounting bracket. Typically one screw is sufficient,
but we provide two if needed. Be sure you are screwing into the wood and
not the plastic parts of the sidwall carpet or the metal strap or metal
fenderwell.
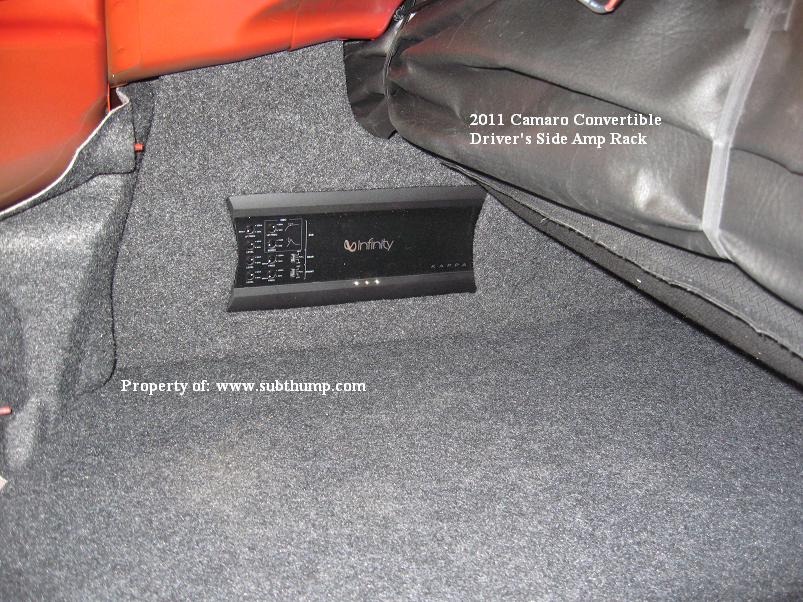
Next, mount your amp and make all your wire connections.
Once your cover plate is trimmed and carpeted, use the velcro strips to fasten
the cover plate to the edges of the amp base. Now your cover plate is held
on by velcro and you can access your amp easily. If your velcro doesn't
stick to the carpet very well, you can staple it down with a staple gun and
hammer the staples flat. The final install should look something like
this.
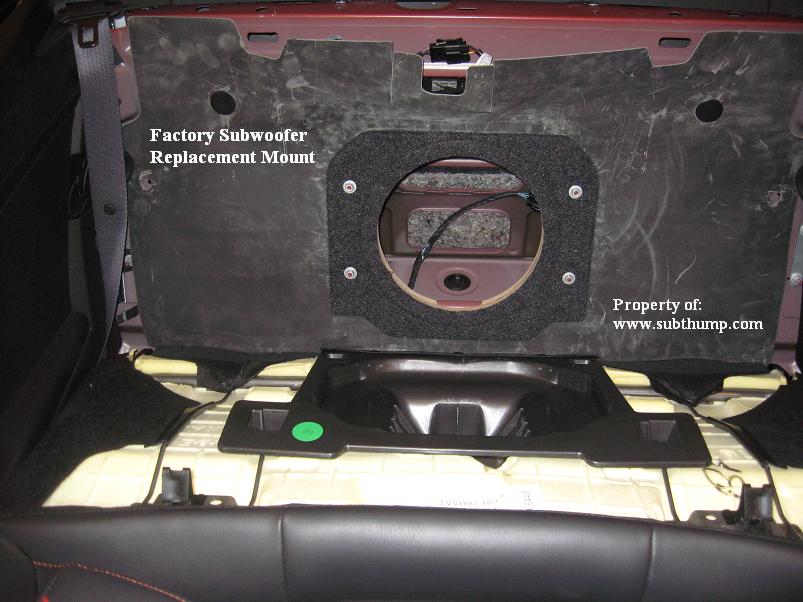
Since the factory sub is weak and has no bass, we created a simple
yet effective way to replace it with a better aftermarket subwoofer. The
convertible subwoofer is located behind the rear seat. There are actually
two walls behind the seat. The sub is mounted in the front wall, then
there is an open cavity with some bracing and then another wall that creates the
front of the trunk. To gain access to the subwoofer, you must fold down
the rear seat. The easiest way to do this is to start by putting the top
Down. Once you put the top down, gather up the following and climb into
your back seat. A. Flat Blade Screwdriver B. Large
Clean Soft Towell C. 10mm Wrench or 10mm Deepwell Socket and
Rachet. We find it rather comfortable to sit on the back of the center console
while working in the back seat. Before you do anything, fold the towell
and lay it over the seat belt buckes. Because when the seat folds down,
the towell will protect your seats from getting poked.
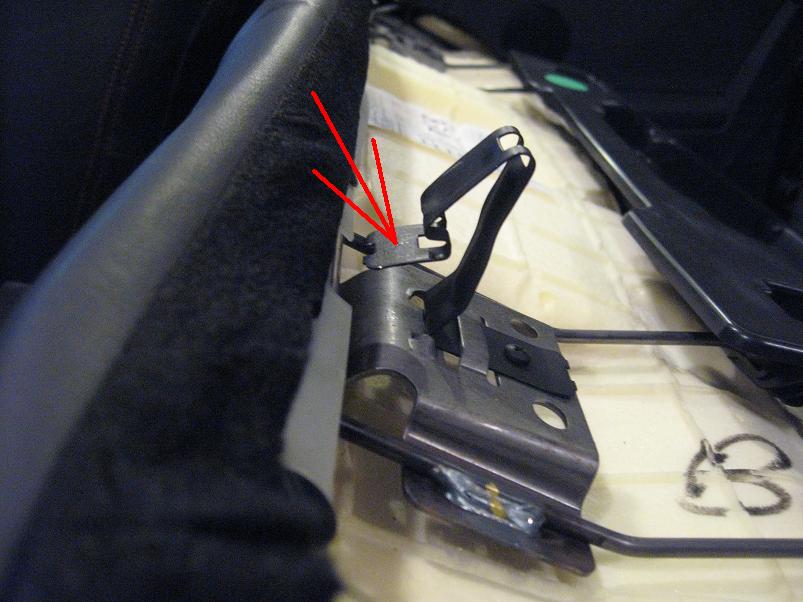
Now that you're comfortable, there are two clips that secure
the top of the seat to the wall. They look like this:
The red arrow in the above photo shows you the direction you need
to push to release the clips. There are two clips in all. One on
each side about 8" over from each seat belt. There is a metal lip right
behind the seat that has a hole on each end. The small hole is a marker
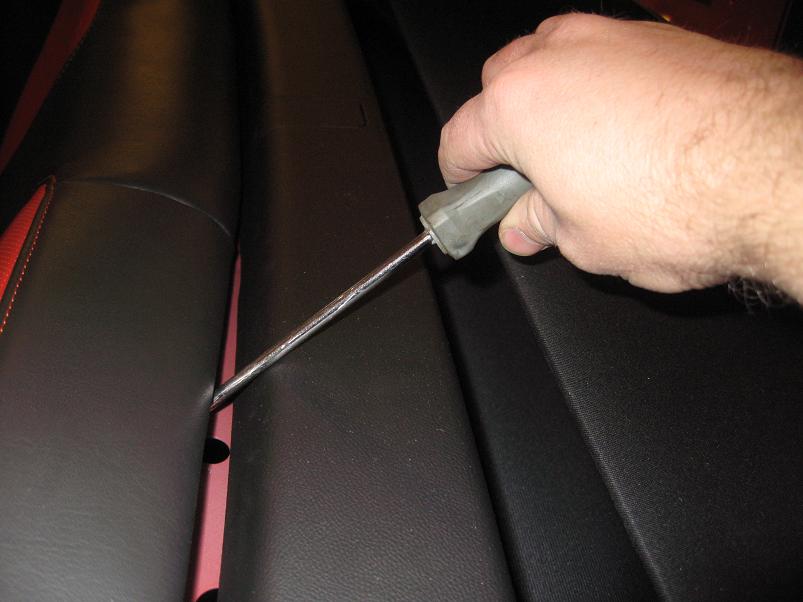
for locating each clip (ignore the bigger hole). The best method we've
found for releasing the clips is to use a flat blade screwdriver. Turn the
blade so it is straight up and down (not flat parallel to the metal lip).
Pull the seat toward you so you don't scrape or poke the seat and feel the blade
contact the clip. The clips are very stubbon. We have needed to hit
the end handle of the screwdriver with our palm in order to release the
clips. Once the second clip is released, the seat back will pop forward and
you can fold it down.
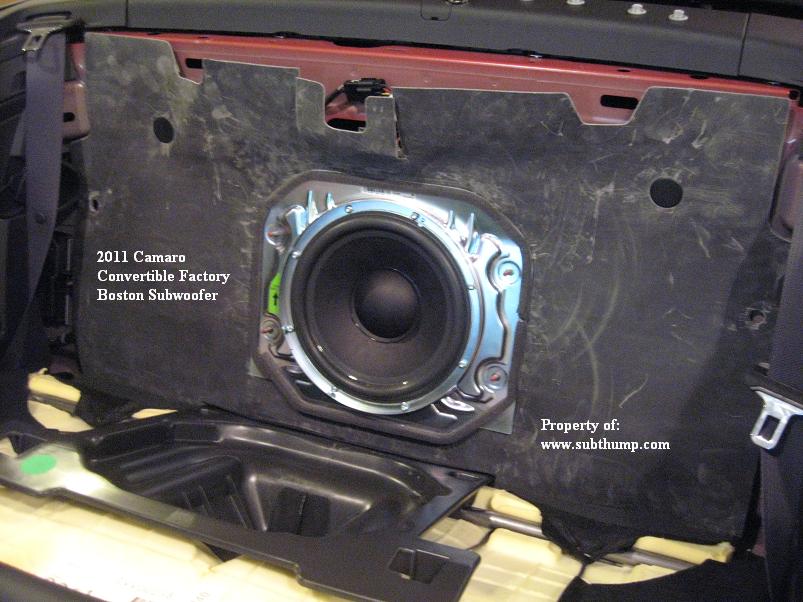
Once the seat is down, you will see the stock piece of junk
woofer.
Remove the four 10mm nuts and the metal plate and woofer will pull
off. Unclip the harness and remove it. Our Subwoofer Plate mounts
the exact same way. But the factory wiring is too tiny to be
utilized. So you will want to run some nice 10-12 ga. speaker wire under
the trunk wall to hook up to your subwoofer. The nice thing about our
mount is that once you screw your subwoofer to it, you can remove the
assembly as often as you like by removing those four 10mm nuts. Keep
in mind that there is only about 6.5" of subwoofer depth behind the mount.
If your sub is deeper than this you have two options. A. Use a
different woofer. B. Cut the metal of the trunk wall. We recommend
option A because there are no gurarantees a larger woofer will sound any better
than a normal size woofer and larger surrounds are likely to rub on the plastic
shield or seat.
There are a couple things we have found that will
help your behind the seat subwoofer sound much better. That is to enclose
it a bit so to speak. First, sound deaden as much as possible. As
you can see, the walls have lots of air ways and cutouts in them. We
recommed you deaden over to cover them up so the dead cavity is as tight as
possible. That means the whole front of the wall AND inside the dead
cavity as far as you can reach. Don't forget to hit the braces because
they can rattle too. Oh and we noticed a black electrica box above the
woofer that vibrates badly. So try to pack something around it to keep it
from buzzing.
Our second secret ingredient is PolyFil. Yep
the stuff you find at the wal mart craft section for $2-$3 per bag. Get
yourself a couple bags. There are 3 main spaces in the dead cavity.
Left, Right, And Center. In the left and right cavities, cram as much
polyfil in them as you can get. Use a stick if necessary to get all the
way in there. Then in the center cavity, put a small amount of "light
fill". In other words, keep it fluffy and loose in the middle but really
pack the sides tight. Once you get your sub broke in, it will jam much
better and with no annoying vibrations.
Once finished fold the
seat up. Make sure your subwoofer's surround clears the plastic shield
okay. That's it. Your new sub is installed.