|
|
5G Install Guide |
Notice:
This page was created as a guide to assist you in the installation of your enclosure or enclosure kit. This page is meant to be accessed by those who have supported Subthump by purchasing from us. Those who wish not to support us or wish to copy our products, can find their own methods. With that in mind, we ask that you do not display the link to this page in a public forum Or exchange this information in any manner. We are active on most forums and if we see the link to this page posted, we will either change the link or delete this page altogether. Thank you.
Below are detailed tips and instructions on how to install our 5th gen products. They are meant only for customers that support us by buying directly from us. Copyright: www.subthump.com strictly prohibits this text and photographs from being linked to, copied, or redistributed without consent.
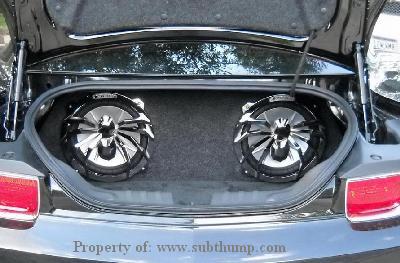
Subthump 5th Gen Rear Fire Sub Box Installation
Installation of this box is relatively simple. You will want to make sure that your wiring is completed before installing the box. Also note that if you decide to use grilles like above they will need to be installed after the box is placed in the car.
1. Install your subs into the box, making sure the wiring to the terminal connections on the box is complete.
2. Open the passenger door. Slide the seat forward and tilt the backrest forward also.
3. Open the trunk access. Turn the box so the speakers are facing up (on rear fire boxes). Load the driver's side end into the trunk first.
4. Aim the box so it goes into the rear driver's side corner. Once the passenger side of the box is in far enough to clear, bring it around so the box is horizontal in the car and the speakers still facing up.
5. Position the box so it is about halfway in the trunk. Now tilt the box upward. As you tilt, slide the bottom of the box toward the seat. The top of the box will come up just in front of the 6x9 speakers. So if the box happens to hit the bottoms of the speakers, then lower the box back down and re-position it further back and re-tilt.
6. Once the box is upright, simply slide it back into place. It is best to start the passenger side first so lead with that side a bit and finish bringing the drivers side around straight. The box is made to fit relatively snug so some hard pushing may be required. Once you think the box is pushed in far enough, go around and look from the seat side. The upper portion of the box should be just touching the plastic trim pieces that line the rear access. If the box has actually pushed the plastic trim forward, then it is in too far. Just back the box out till it is just touching.
Grilles** Please note that if you intend to add speaker grilles that they must be put on after the box is in the trunk. Your box will not slide thru the pass-thru opening if you put the grilles on first.
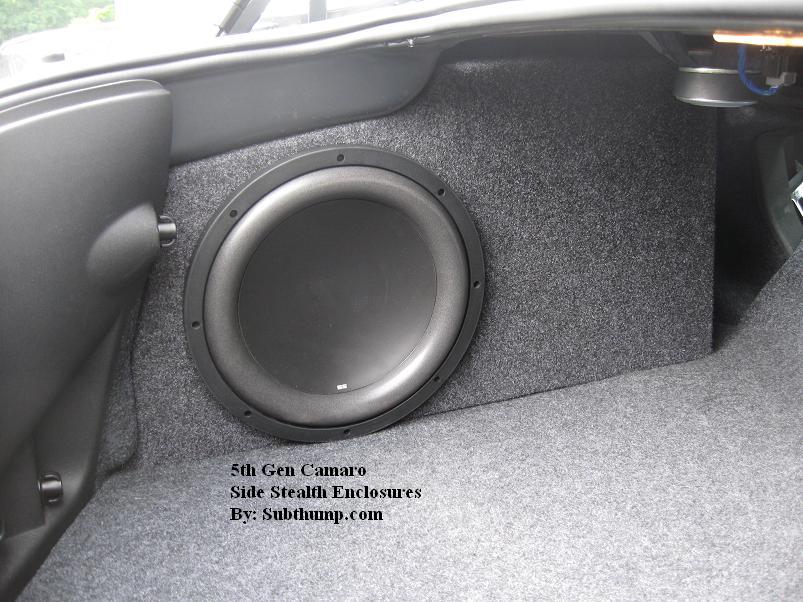
Subthump 5th Gen Large Driver's Side Stealth Installation
Also applies to our Integrated Stealthbox Kits
In order to install our large driver's side box, there is some preparation that needs to be done first. Again, you will want to make sure all of your wiring is done before installing the box. The box is actually the last thing to go in before you are done.
1. First you will need to remove the molded sidewall carpet from the trunk. ie the piece that covers the fender. This carpet is held in place in several places and you must remove them all in order to get it out. Behind the trim of the rear access, behind the rear panel that goes across the rear of the trunk, a clip on the floor behind the fender and a tree plug at the top rear corner. It is not completely necessary to remove the plastic panel that goes across the rear of the trunk, but you will need to remove several of the threaded storage net retainers to get the carpet out from behind it.
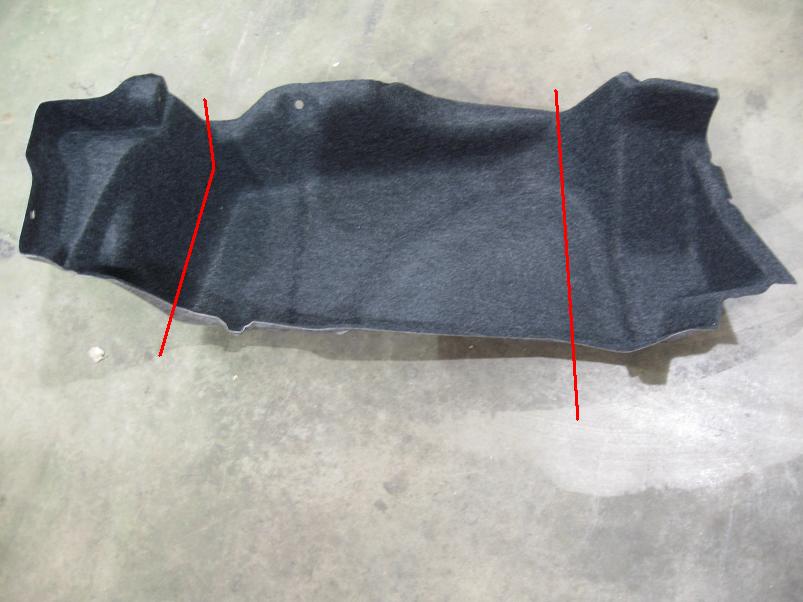
2. Once the carpet is out, you will need to cut it in two places. If you get to this point and are worried about cutting your carpet you can either order a spare so it's on the way or wait till the spare pieces arrives and cut it. The GM part number for the left side carpet is 92219062 Also, if you make your cuts clean, the carpet pieces appear that they could be seamed back together for those wanting to take a shortcut. We have ordered spare pieces from GM Parts and also from ebay. The GM part will run you around 32-35+shipping and it is a true oem replacement and will look perfect if you decide to cut your carpet and use the GM replacement at a later date.
3. You will need to cut the carpet according to the red lines in the diagram below. The key is to leave enough carpet in the corners so the metal of the car is covered when the box is installed. The second pic shows our carpet after it was cut. A sharp razor blade is all you need.
4. Before the carpet can be put back in, there are a few other things that need to be done. First, the wiring harness that goes toward the back needs to be re-located and the battery cable needs to be secured out of the way. These may be optional. You could probably get the box in fine without these, but having the wiring out of the way will make it much easier.
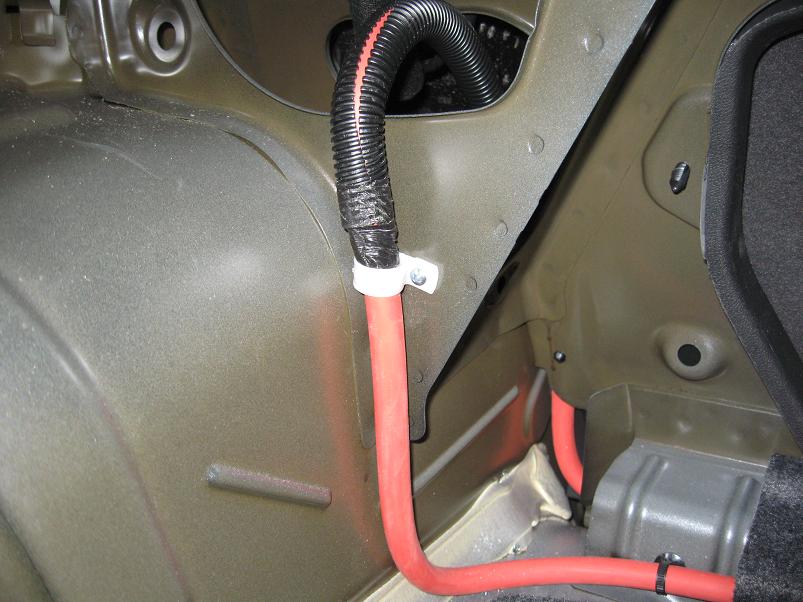
5. Battery Cable. The battery cable on our car at least is curled outward and kinda in the way. We bought some cable clamps and some self drilling screws and secured it closer to the metal wall in the front of the trunk. See 1st pic below.
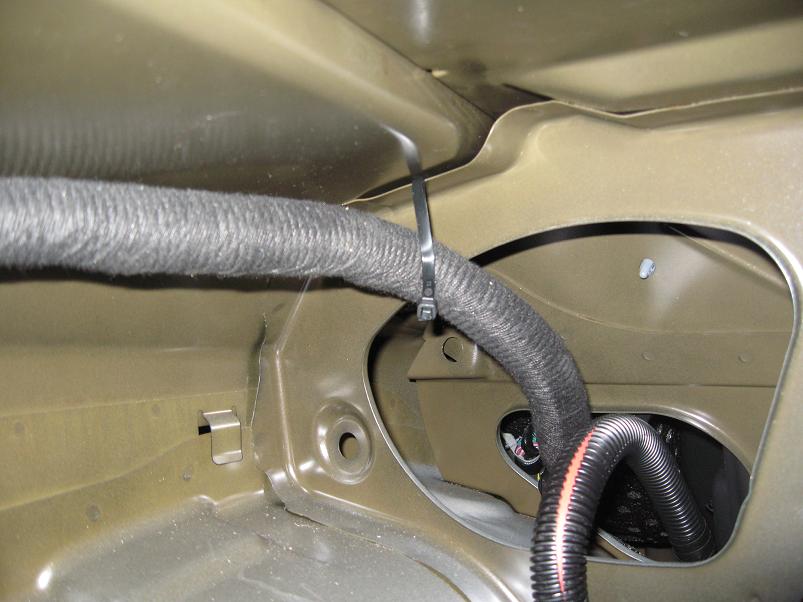
6. Wiring Harness. The harness that feeds the tail lights and factory amplifier (if equipped) will also need to be moved up and out of the way to ease installation. See 2nd pic above. At the front location, we used a cable tie and looped it around the metal brace in the car. You can also use some self adhesive cable clamps if you prefer. At the rear location above the fender, we used another cable clamp and self drilling screw (pic 1 below). The idea is to get the harness up as high as possible so the box can slide underneath. Push any excess harness down and toward the outer part of the fender.
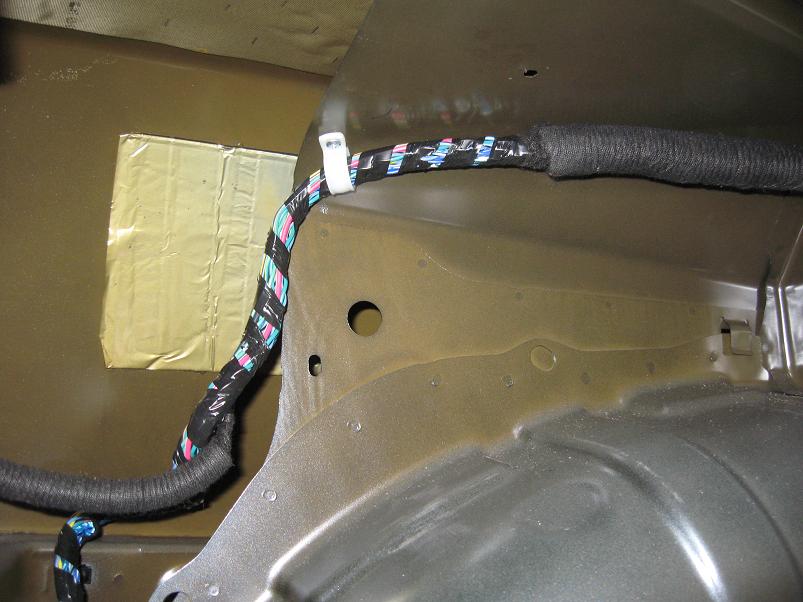
7. Hanger Bracket. The last minor thing to be done is to bend the hanger bracket back. This is the same top bracket that the molded carpet was fastened to earlier. It needs to be bent upward slightly to give the box enough clearance. A couple love taps with a hammer is all that's needed. Pic. 2 above shows the bracket has been moved out of the way to allow full clearance for the box.
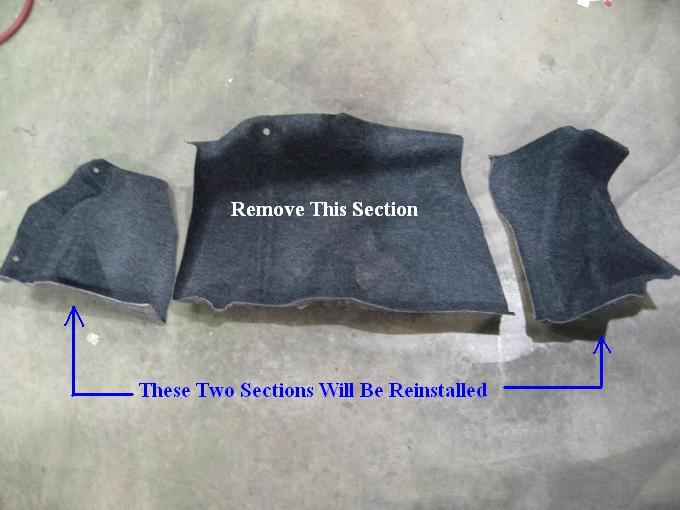
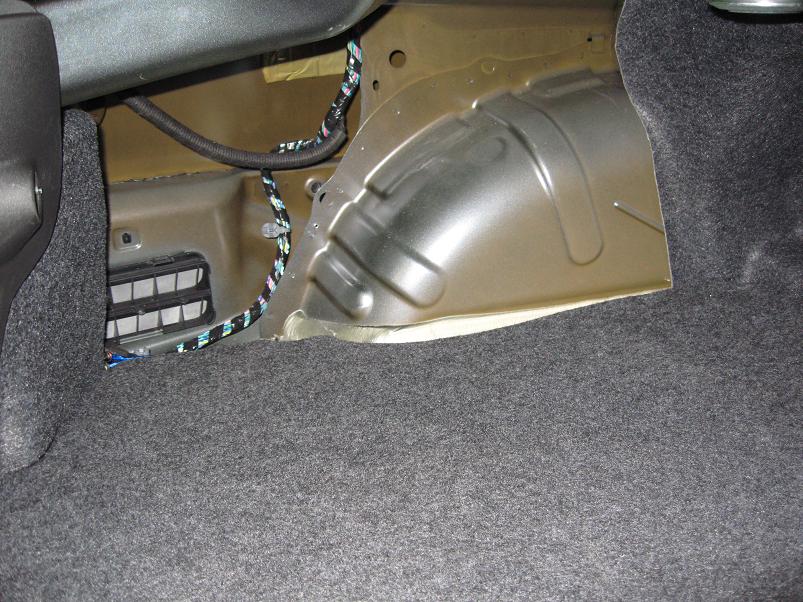
8. Once the wiring is secured and the bracket moved, you can re-install the carpet. Install the small rear section behind the plastic rear panel and install the front section behind the trim that lines the rear access. Pic 2 above shows what our trunk looks like with the carpet trimmed and reinstalled.
9. Wire your sub to the terminal connection on the box and install the sub. Place the box in the trunk sideways with the sub facing toward the front. As you scoot the front part of the box toward the front corner of the trunk, slide the rear of the box over so that the box feeds between the trunk opening and the left 6x9 speaker. Once the front corner touches, bring the rear around. At this point, make sure the left most threaded cargo net retainer has been removed. Reach in and pull the front of the box outward toward the middle of the trunk. This will allow the rear of the box to slide past the threaded stud on the back wall. Now, simply push the entire box inward until it stops. Installation is complete. There's really no need to secure this box as it fits very tight, but you may do so if you desire.
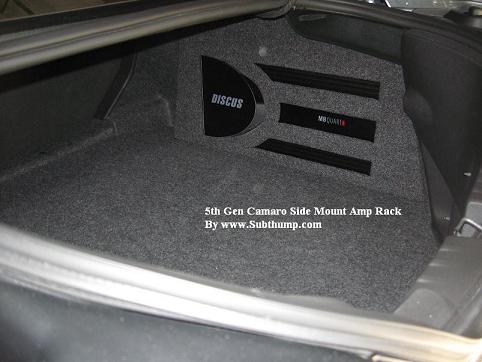
Subthump 5th Gen Passenger Side Amp Rack
Our passenger side amp rack is pretty easy to install. Just make certain all your wiring is completed before installing and that you have enough wiring to reach. Speaker wire can be run forward and tucked under the cargo mat and run over to the opposite side to feed the driver's side box.
1. Mount your amp to the mounting plate of the amp rack.
2. Place the assembly into the car. You may wish to connect your wiring before securing it, depending on where your wires a fed from. We now trim a spot in the back so wires can be fed easier.
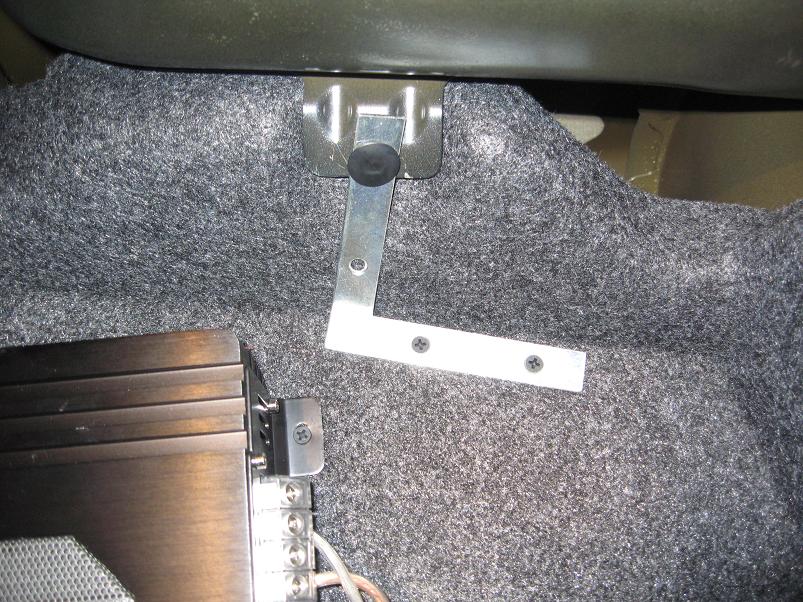
3. There are two brackets that ship with each amp rack. An "L" angle and a Flat Angle. At the front of the trunk, there is a M6 stud sticking down. Use the supplied "L" angle and slip in onto the stud and tighten it down semi-snug with the included M6 nut. It may be possible that you will need to drill out the hole slightly in the end of the bracket to enable it to slide easier. See pic 1 below If you decide you need to tilt the rack out to finish your wiring, simply rotate the bracket of the way and the rack will release. Tighten the nut fully only when you are all done.
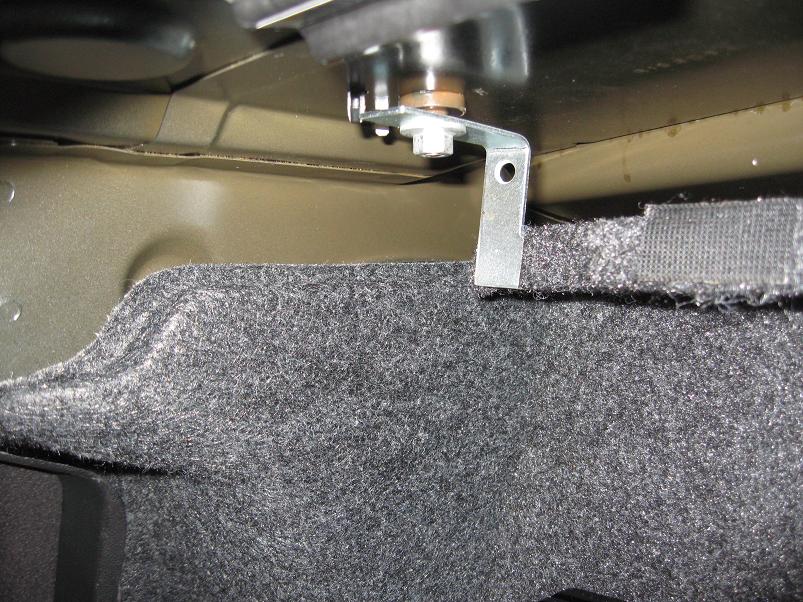
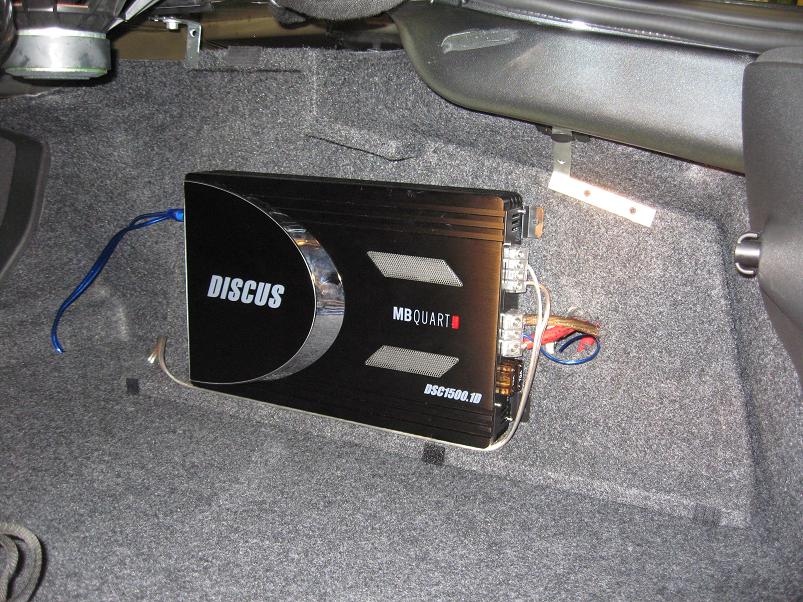
4. The flat bracket is for attaching to the rear hanger bracket in the car. For illustration purposes, we tucked our carpet behind the hanger bracket so you can see what's going on. All you need to do is remove the tree plug. Put the bracket in a vise and bend it so it matches the angle of the hanger. Drill out the mounting hole in the flat bracket so it is large enough to accept the tree plug. Once the angle of the bracket matches that of the hanger and amp rack, screw the bracket to the amp rack with the provided screws. If you need to remove the amp rack, simply pry the tree plug out and release the front L bracket as detailed earlier. Below is our amp rack with the cover removed.
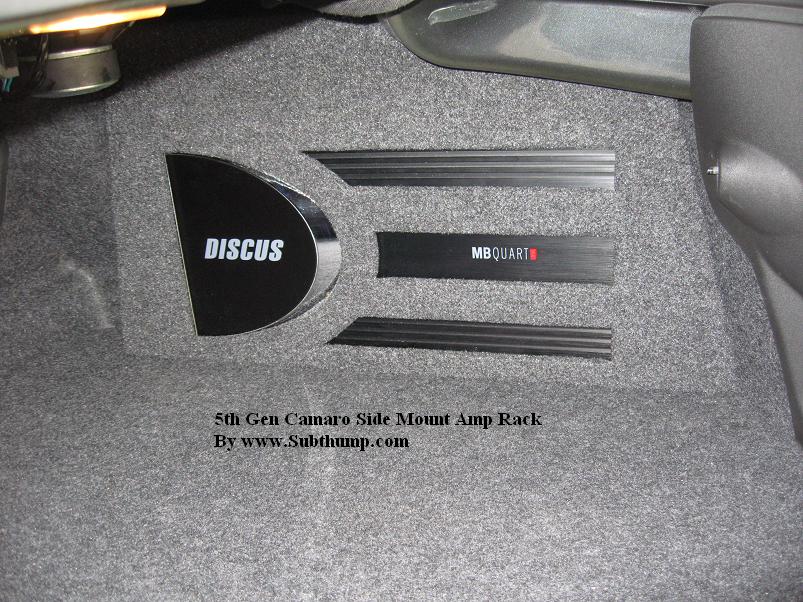
5. Now you will want to trim your cover plate so it can be installed. You are more on your own here as the trimming is totally up to you. Our cover will let you be very creative. You will have to do some marking and measuring so the amp will line up where you trim. It is also possible that you may need to unscrew the amp and move it slightly so it aligns with your cutout.
6. Once you have the cover plate trimmed, you will need to carpet it with the supplied carpet. Any type of spray adhesive will work.
7. The cover is held on by velcro strips. You will keep the velcro together and pull the backing of of one side. Place the strips on the protruding edges of the amp rack as seen in the pic above. Next, remove the remaining backing on each velcro strip.
8. Place the cover plate in the trunk, but keep it away from the sticky side of the velcro strips. Move it toward the back so the cover plat rests against the carpet on the back wall. Now, push the cover plate toward the amp rack and apply pressure. When you pull the cover plate off, the hook and loop parts of each velcro strip should separate. If some of the velcro doesn't stick, you can take a staple gun and staple thru it and this will hold it secure. Now you can quckly and easily install and remove your cover plate when needed and without tools.
|
|
|
|
|
|
|
 |