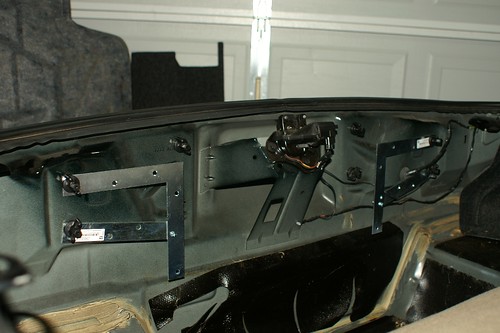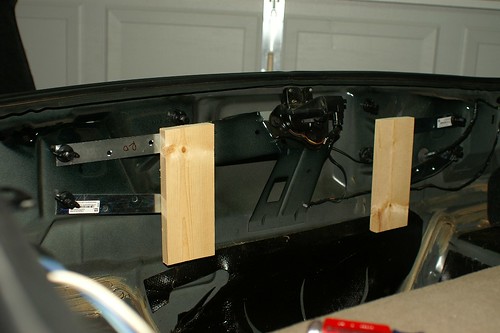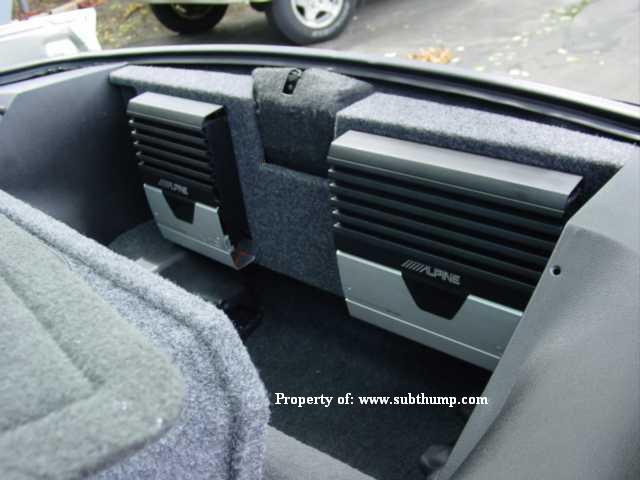
First of all, we would like to thank you for your purchase. This page was created as a guide to assist you in the installation of your amp rack. This page is meant to be accessed by those who have supported Subthump by purchasing their amp rack from us. For those who wish not to support us, they will need to come up with their own ways to mount their amp racks. With that in mind, we ask that you do not display the link to this page in a public forum. We are active on most forums and if we see the link to this page posted, we will either change the link or delete this page altogether.
Installation:
There are two ways to mount this amp rack to your car. One way is to use self-tapping screws and screw it directly to the metal behind the amp rack. And that's it. Quick and simple and you're done.
The second way is outlined below. By using this method, you can mount the rack securely and repeatedly using existing mounting points and avoid putting holes in the body of your car.
Keep in mind that the test vehicle for this project and tutorial was a Camaro so the specifics below are based on a Camaro. Pontiacs are slightly different on the back wall and require slightly different brackets, but the principal is the same for both. Essentially you are mounting wood blocks behind the rear carpet to screw your rack into. We do not have access to a Pontiac so you will have to apply these techniques and be a little creative on your own as far as the brackety is concerned. If you want to see an example of how to mount to a Pontiac, you can view the photos at the very bottom of this page and this will give you a very good idea what to do.
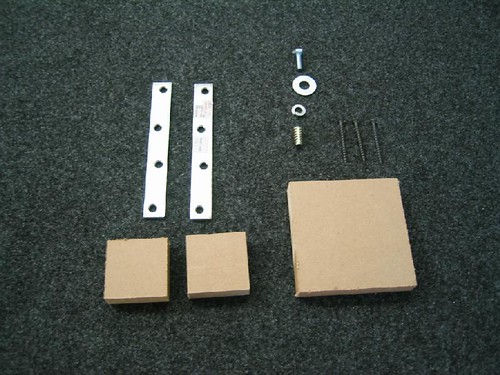
Here is the hardware that you will need (Camaro):
- Two 6" metal mending plates (metal brackets with holes)
- Two 2" x 2" blocks of 3/4" mdf or pine
- One 4" x 4" block of 3/4" mdf or pine
- Two 2" wood screws
- One 1-1/4" wood screw
- Two 3/4" flat head screws (not shown)
- One 1/4" by 1-1/4" carriage bolt (not shown)
- One large washer
- One 1/4" lock washer
|
 |
| |
|
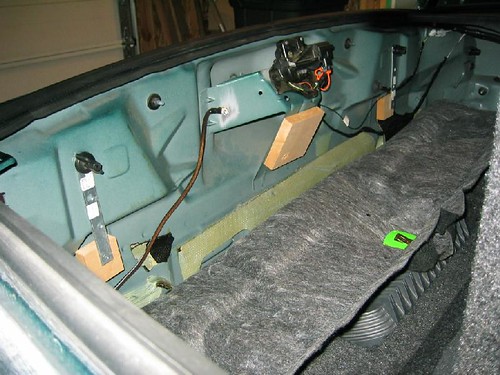
STEP 1 First, you will be creating a solid surface for screwing the upper center section of the amp rack. This block will be bolted to the car's center bracket that holds the lock mechanism for the trunk. There is an existing hole in that bracket so no drilling of the metal is required. The hole is egg shaped, so be sure to use a rather large flat washer and a lock washer to keep the bolt from coming loose.
Take the 4x4 block of mdf and drill a 1/4" diameter hole in the lower right-hand corner approximately 1" from the right side and 1" from the bottom. Next pull your trunk-liner forward and mount the block on the bracket by putting the carriage bolt in from the front side. Slip a large washer and lock washer over the bolt and then the nut. Tighten it down with a wrench until it's snug.
STEP 2
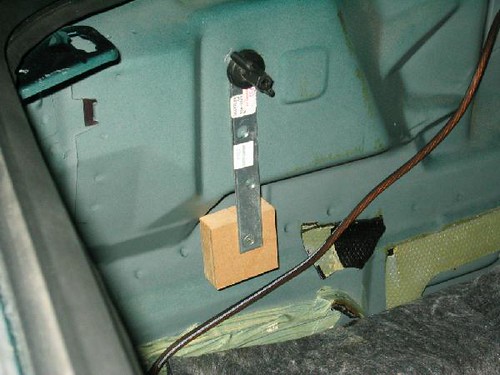
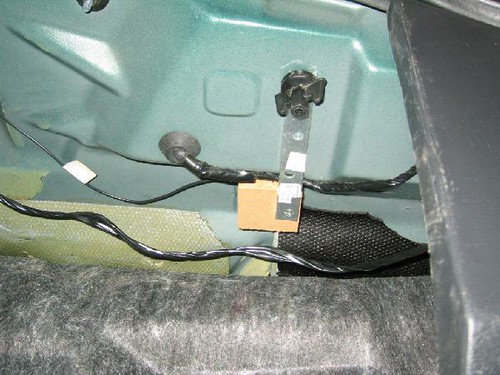
Next, you will be making two brackets to secure the far ends of the rack near the bottom. With the trunk-liner still pulled forward, locate the big plastic wing-nut that holds the tail-light assembly on. Take one of the metal brackets and slip it over the tail light bolt and re-apply the wing nut over top. Make sure that the counter sink side of the brackets is facing forward. Next, take one of the small wood blocks and place it behind the metal bracket near the bottom, in that recessed area. Attach with the flat-head screw as shown in below. Do the other side exactly the same way so both sides are finished.
STEP 3
Once all the brackets are in installed and the carpet still pulled forward, dry fit the amp rack. Put marks on the amp rack where you can drill small holes and your screws will screw into the blocks. Next, put the carpet back in place. You will notice that you can't even tell the brackets are installed under the carpet. The carpet actually molds around them quite well. After running all your wiring behind and thru the amp rack itself, it is time to secure it. Position the amp rack so that it lines up with the top of the plastic side panels. Most ppl let the rack "rest" on the side shoulders of the trunk. But depending on the car, if the top of the rack isn't quite flush with the tops of your trim panels, you can shim it up temporarily while you shoot the screws.
STEP 4
Pull it tight toward the back and screw it into place. The longer screws (2") go on the ends near the bottom and the short one (1-1/4")goes in the middle near the top. Make sure that you have the screws lined up so they will be going into the blocks of wood that you mounted to the car. You are Finished. That was easy.
(notice the pre-drilled holes for routing wiring) Find a hole you want to use, slit the carpet and run the wiring thru. The holes not used are carpeted over and you can't even tell the holes are there. You may also drill additional holes for more convenient routing of wires. Just be aware that the carpet will want to wrap around your drill bit. So cut it away and be cautious about the wrapping part.
Customer Installation Photos (Pontiac Firebird)
Below are a few more customer photos that may give you more ideas on how to easily install your amp rack in your firebird or TA and the materials you might need.
